Adobe Captivate has provided its users with a set of default Skins. You are able to fiddle around and change the options available to customise these Skins to suit your preference. The underlying elements of Skins within Adobe Captivate include, playback controls, border and table of contents.
Steps to Use the Skin Editor
STEP 1:
Start off with having a new Adobe Captivate window open or one which you were currently working on.

STEP 2:
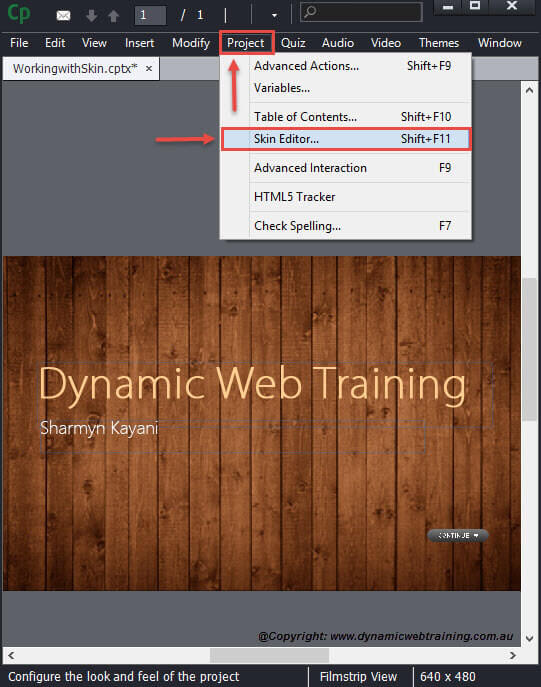
Navigate to the Menu Bar and select Project. From the drop down select the Skin Editor option.
STEP 3:
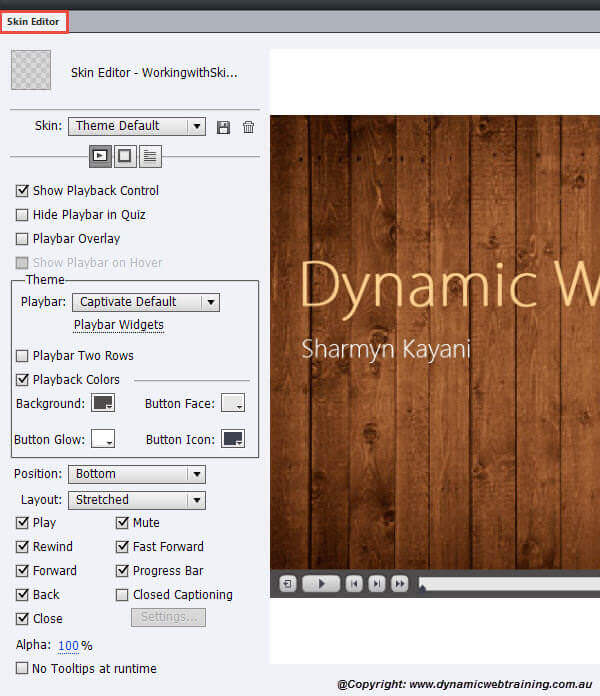
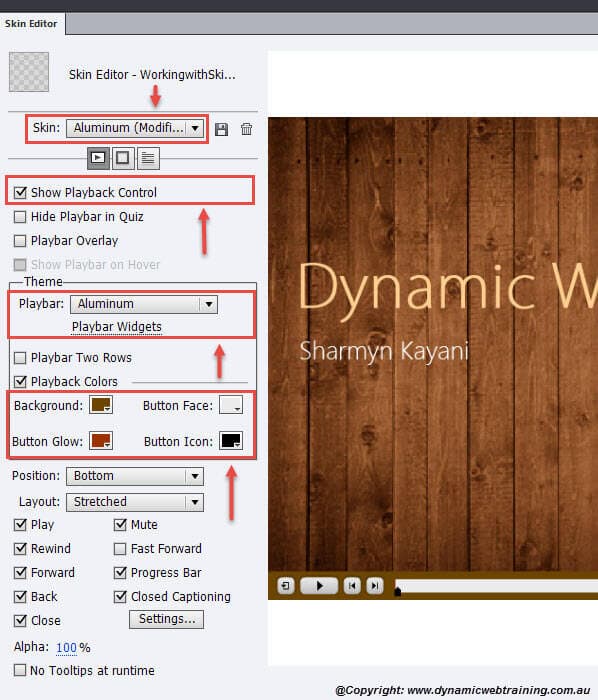
The Skin Editor window will open up. On the right your project will appear with the playback control at the bottom and the Skin options on the left.
STEP 4:
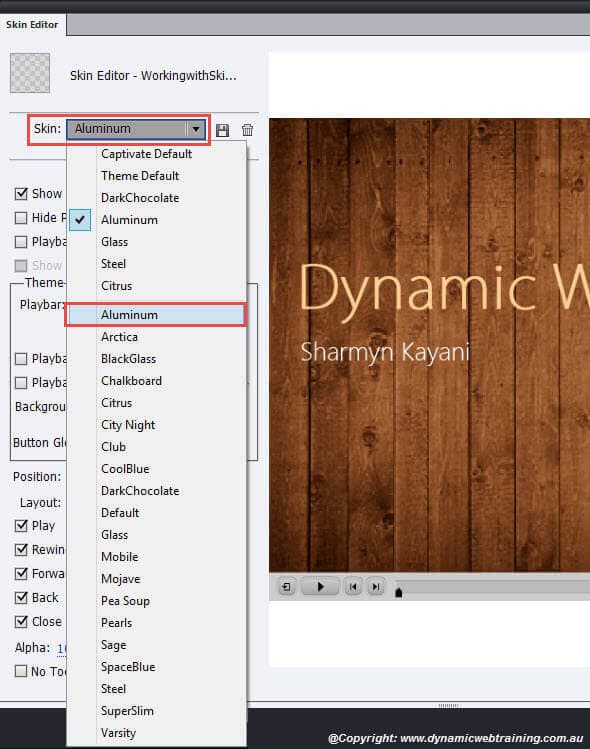
Next to the word Skin there is a drop down option. Click on the arrow and have a look at all the various skin themes available, select Aluminium.
STEP 5:
Make sure the Playback Control option is selected and from the Theme section have the Play bar option set as Aluminium.
Continue on top make sure the Playback Colors option is selected. Underneath you will be supplied with numerous options that you can alter to change the colour scheme of the playback control. Make sure to play around and see how each option changes a certain aspect of the playback control.
(Background, Button Face, Button Glow and Button Icon)
STEP 6:
Once you are confident with how your playback control looks you can choose what Position you want the control to be at. I have decided to keep the playback control in its default location, at the bottom.
There is no need to worry about saving the settings as this is automatically done for you, just exit out.
STEP 7:
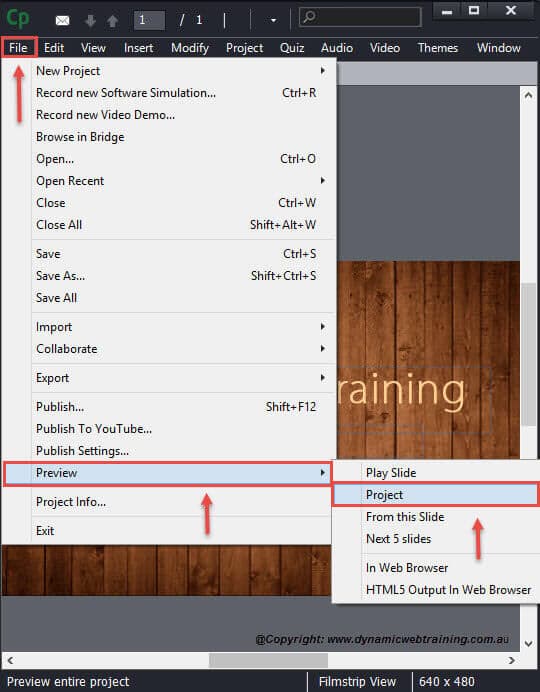
You are able to view your Skin by going into the Menu Bar selecting File and from the drop down select Preview and then Project.
